
Starting a RIO Driftboat Kit Build
Mar 19th 2024
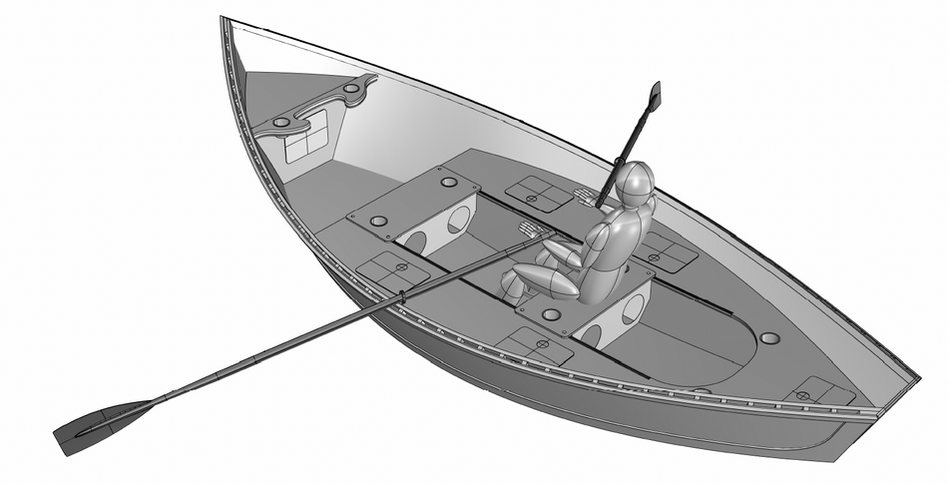
Builder Jeff Allen sent the following write-up on beginning his build of our Glen-L RIO Drift Boat kit. Not only does his description serve to assist future RIO builders, it should benefit anyone working on a similar glassed stitch-and-glue project. —Glen-L Crew
My equipment list:
Rio Drift Boat Fiberglass Kit
Resin and hardener pumps
Small 2” hair paint brushes (numerous) or foam brushes
8” foam rollers and handles
Disposable roller pans
Plastic one quart measuring cups for resin mixing. Reusable peel out hardened resin
Tongue depressors for resin mixing. Reusable after wiping off resin.
Plastic wrap
Wax paper
Scissors
Razor blade scrapers
Retractable razor knife with break off blade.
4” plastic resin spatulas. Reusable after wiping off resin.
Wax mold release for table top.
Painter’s tape
Packing tape
Disposable gloves
Respirator for organic vapors and dust
Paper towels
Flat 1x6 boards for pressing joints
Paint cans, full, or other weights for pressing joints
Sand paper, medium to fine grit. Sanding block or sander, orbital
2 (x) 8’ x 4’ melamine MDF panels
Saw horses 4’ wide. At least 4.
Shop Vac
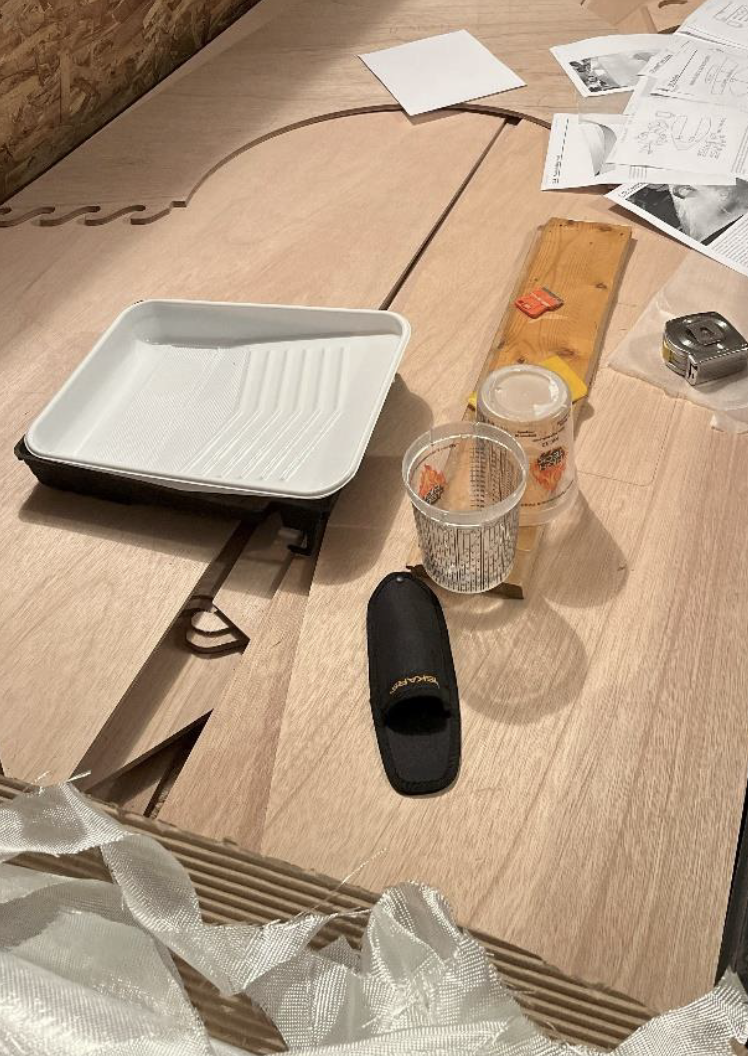
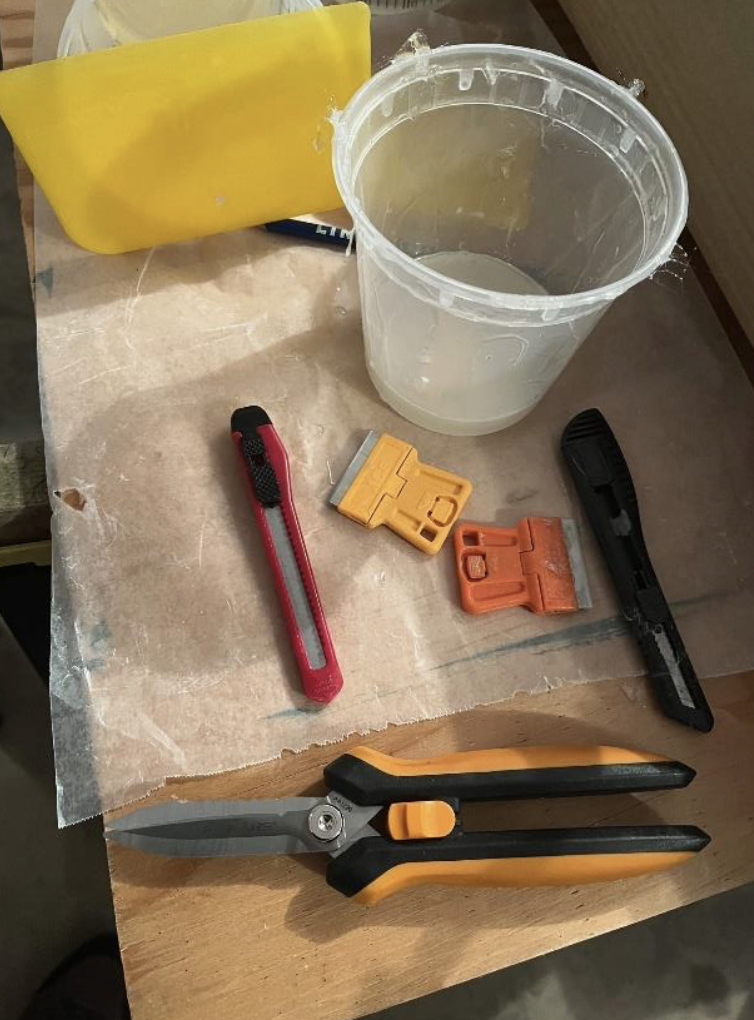
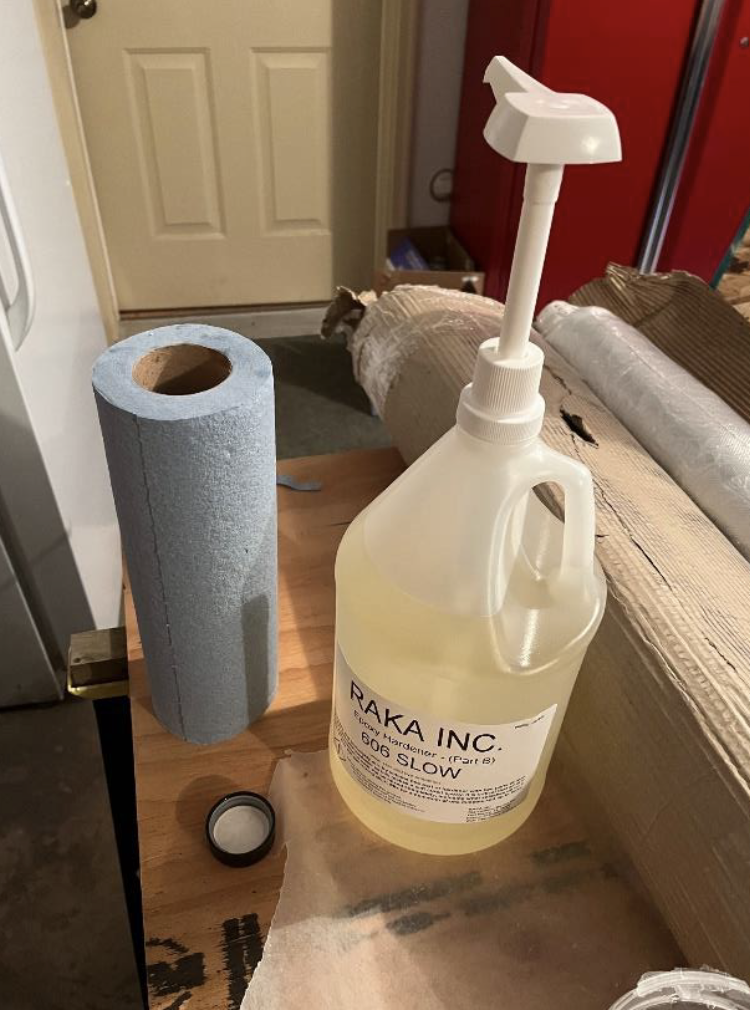
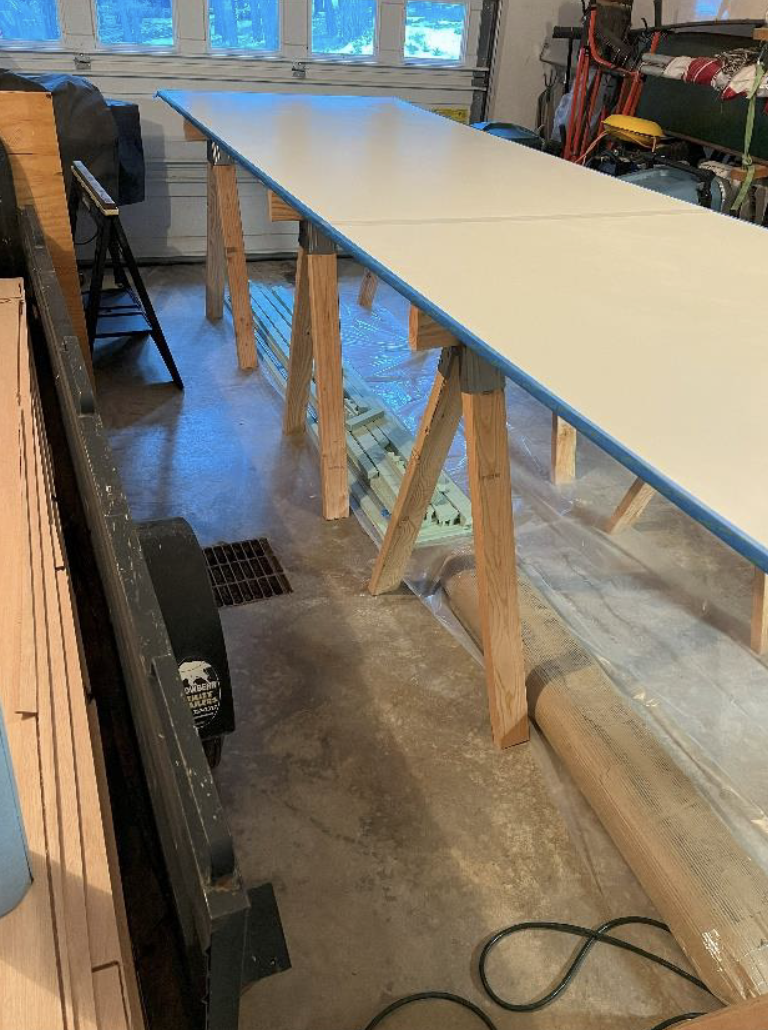
Table construction:
(4) 2x4 saw horses, (2) ¾” 4’ x 8’ Melamine White MDF Panel, Shims, packing tape, blue painters tape,
(2) Plywood doubler, sheet rock screws, wax mold release.\
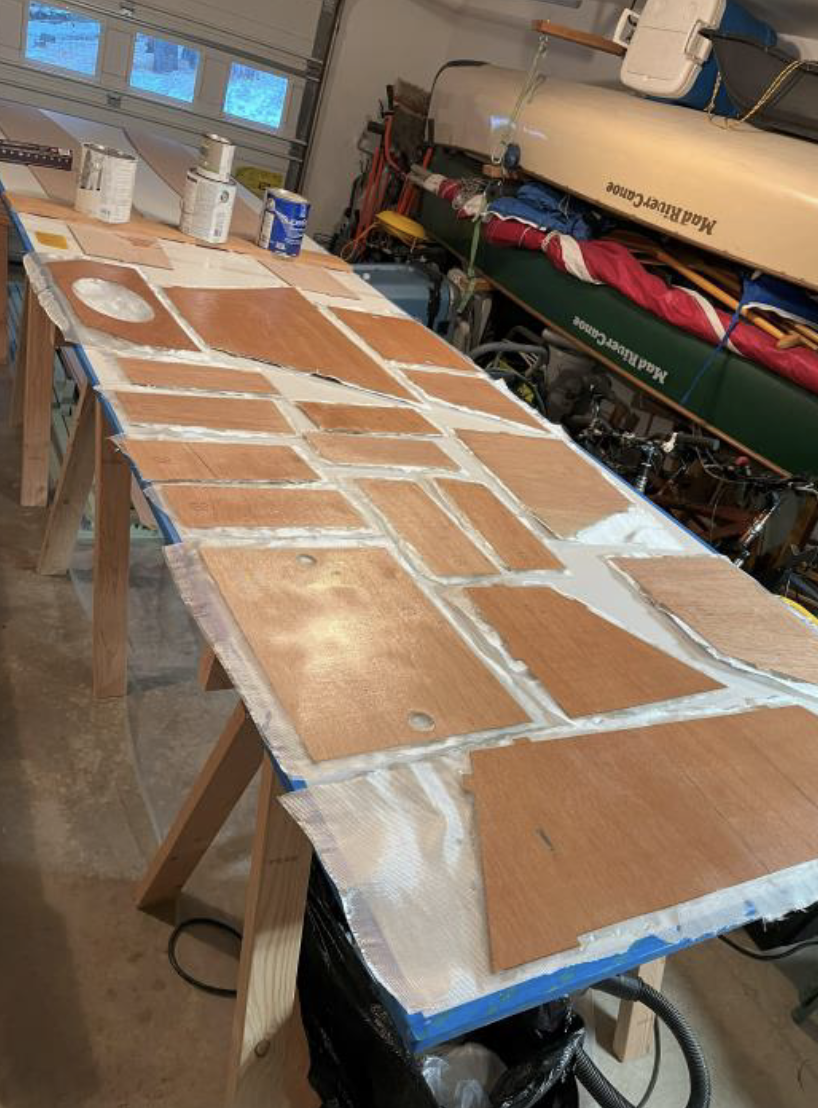
I built my table with the above materials. Being 6’1” tall, I did not want to be bending over a low table for the construction, so I made the table 40” high. After setting and making sure it was flat and straight, I joined the two pieces in the middle with two strips of 3/8” plywood and sheetrock screws. Then I taped the joint with clear packing tape and the edges with blue painter’s tape. The edges of the MDF can be very sharp. Waxing the tabletop is important so that excess epoxy can be scraped off easily and cured panels do not stick.
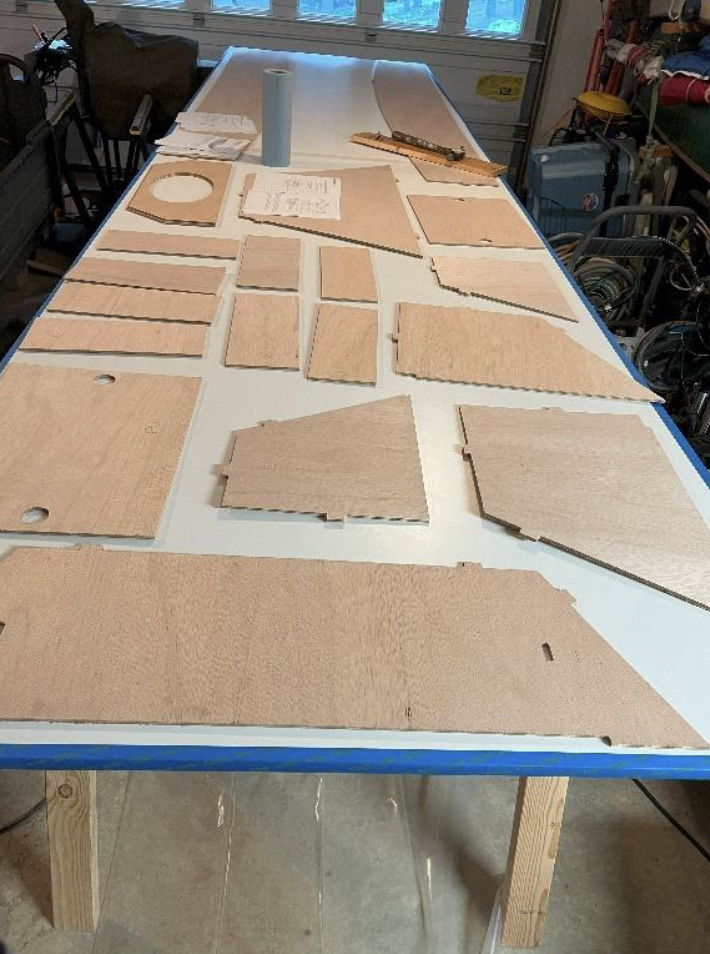
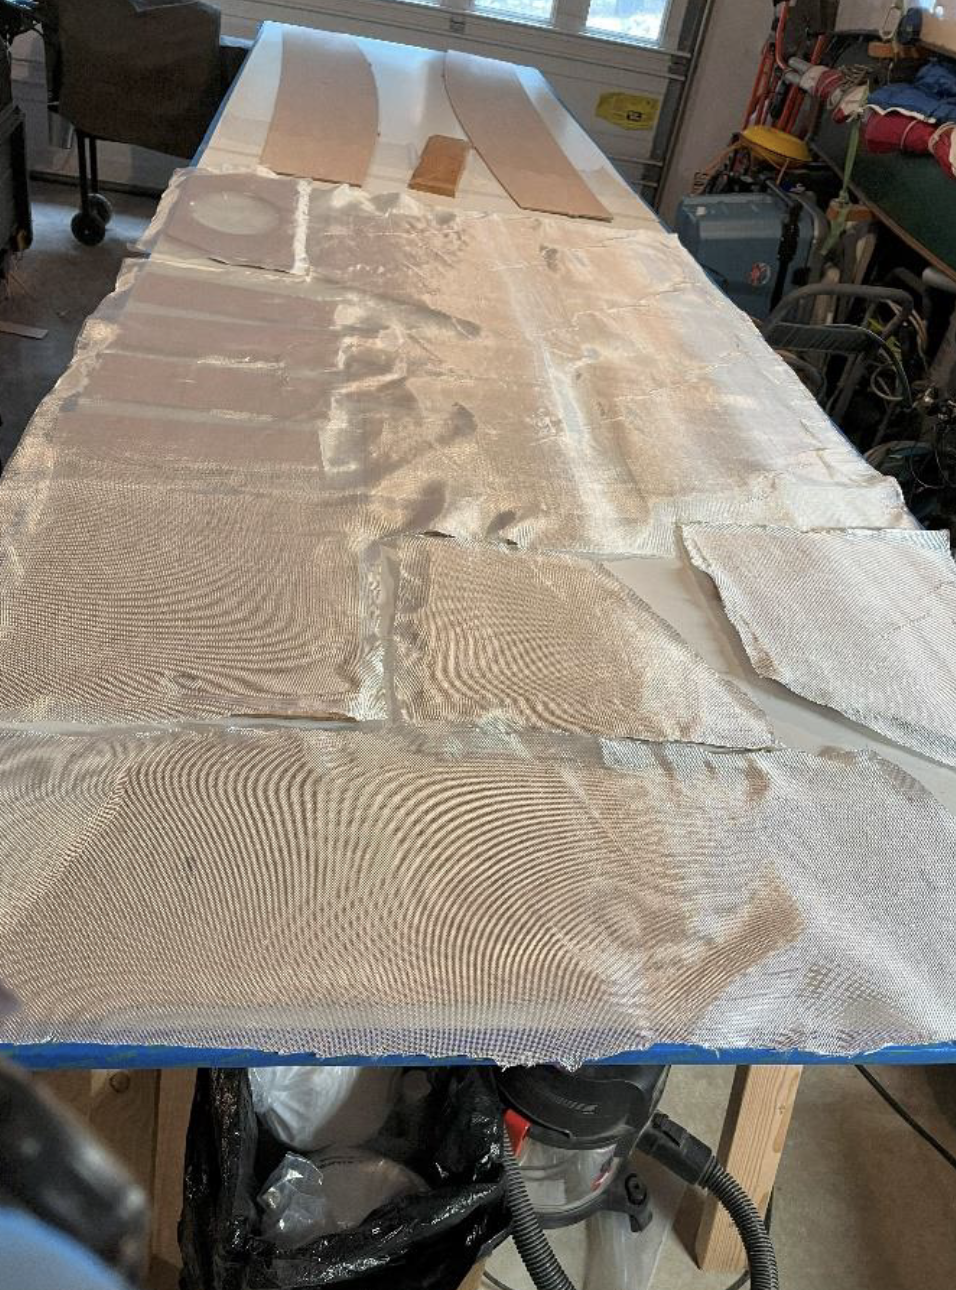
On opening the shipping carton, the foam pieces are on top. I set them aside to directly access the wood panels. Not every part is required to be laminated. Check the instructions for that illustrated list. I decided to start on the many smaller pieces for lamination. Half of the pieces will fit on one table panel at one time with careful placement. Along with them I decided to fit the bench facia panels (TL-P, TL-S) on the second tabletop.
When pulling the boat panels from the shipping case, you will notice quite a bit of sawdust between and on top of the layers. The individual pieces will be surrounded by a web of excess material that made up the sheet stock they were cut from.
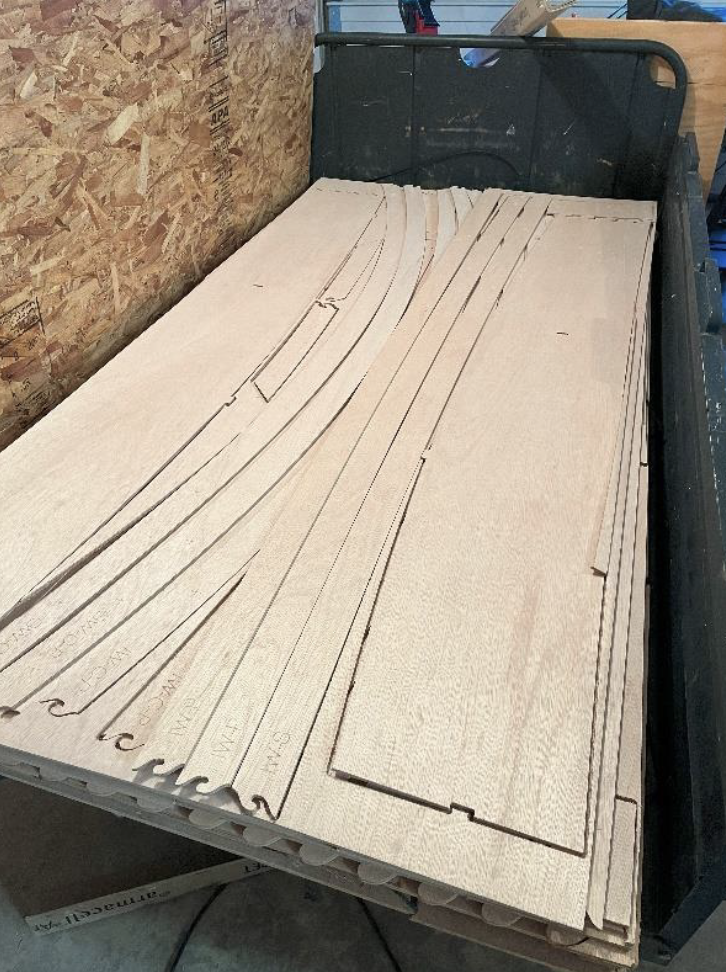
It is important to vacuum and wipe as much of this dust off each piece as you lay them on the table.
Dust control is important for proper epoxy adhesion to the pieces.
Inspect each piece for rough spots and detritus. Later it will be useful to look for pieces of fiberglass threads and to vacuum them up. You don’t want them under the laminate to cause a bump or in the top coat of resin.
Unroll the 6 oz. cloth over the small parts and cut out for each individual part with ½” or more overlap all around. Try to be economical with the cloth and place your parts to take advantage of the cloth area.
Once your cloth is cut for each piece ready the joints on the longer pieces for gluing.
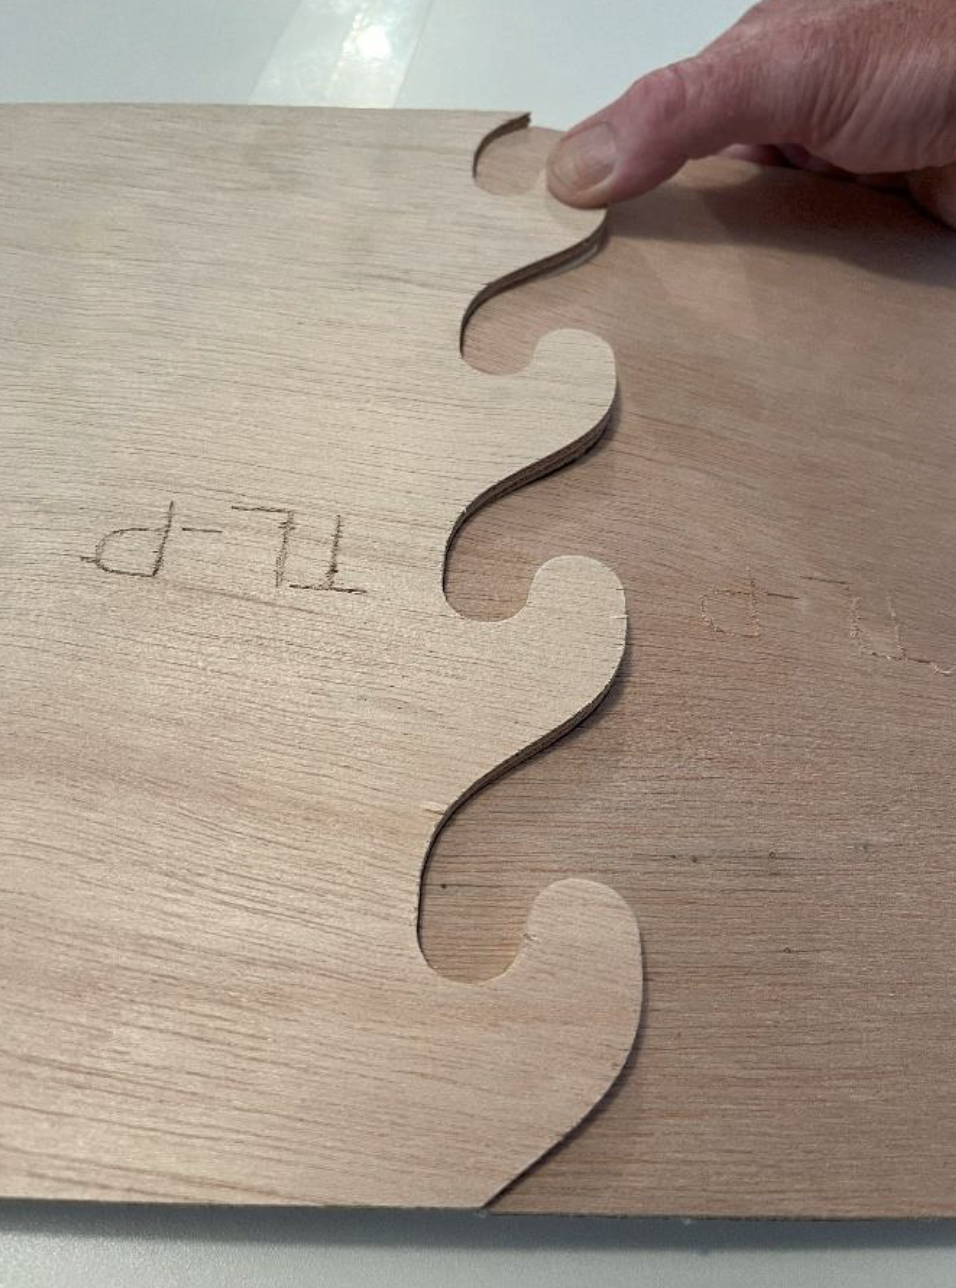
All the pieces of the kit are laser CNC cut as are the joints of the longer parts. Match up the correct part numbers and join them together. They are a tight fit so start them inserting a leading edge making sure the sides are aligned. You’ll propably have to tap them into themselves so use a clean, smooth surfaced board or other object to overlay the joint and gently tap them in. You may need to sand high spots smooth. Place wax paper under each joint and cut some to over lay the joint after wetting it out.
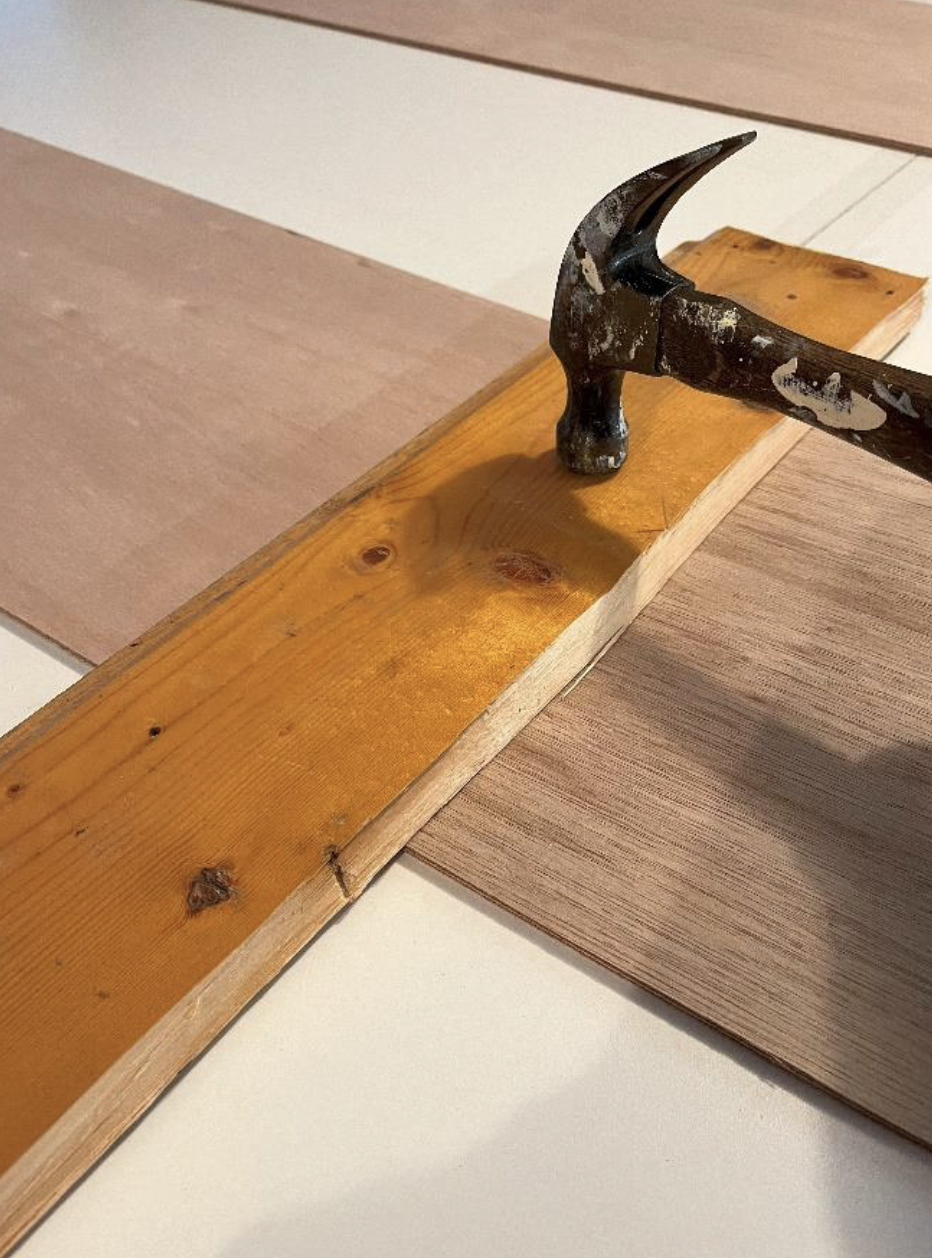
Don’t mix too much resin at one time. The greater the volume the faster it will go off not leaving you time to finish. Better to keep to smaller batches. You also never know when your time may be eaten up with an unexpected situation. I started with about 6 oz of mixed epoxy which will probably wet out half the small parts and sweep a thin coat to the two joints. Reapply to the joint after a minute or so then cover with wax paper, a smooth flat board and some weight. (ie; paint cans)
The jointed parts will take longer to finish as you have to wait for the joints to dry on both sides before glassing.

Make sure the cut cloth on each part has some room around it and not touching the parts next to it. You’ll find that on wetting out the cloth the part may slide on the table. You don’t want them making contact because it may push up your cloth when you least expect it leading to a delaminated section.
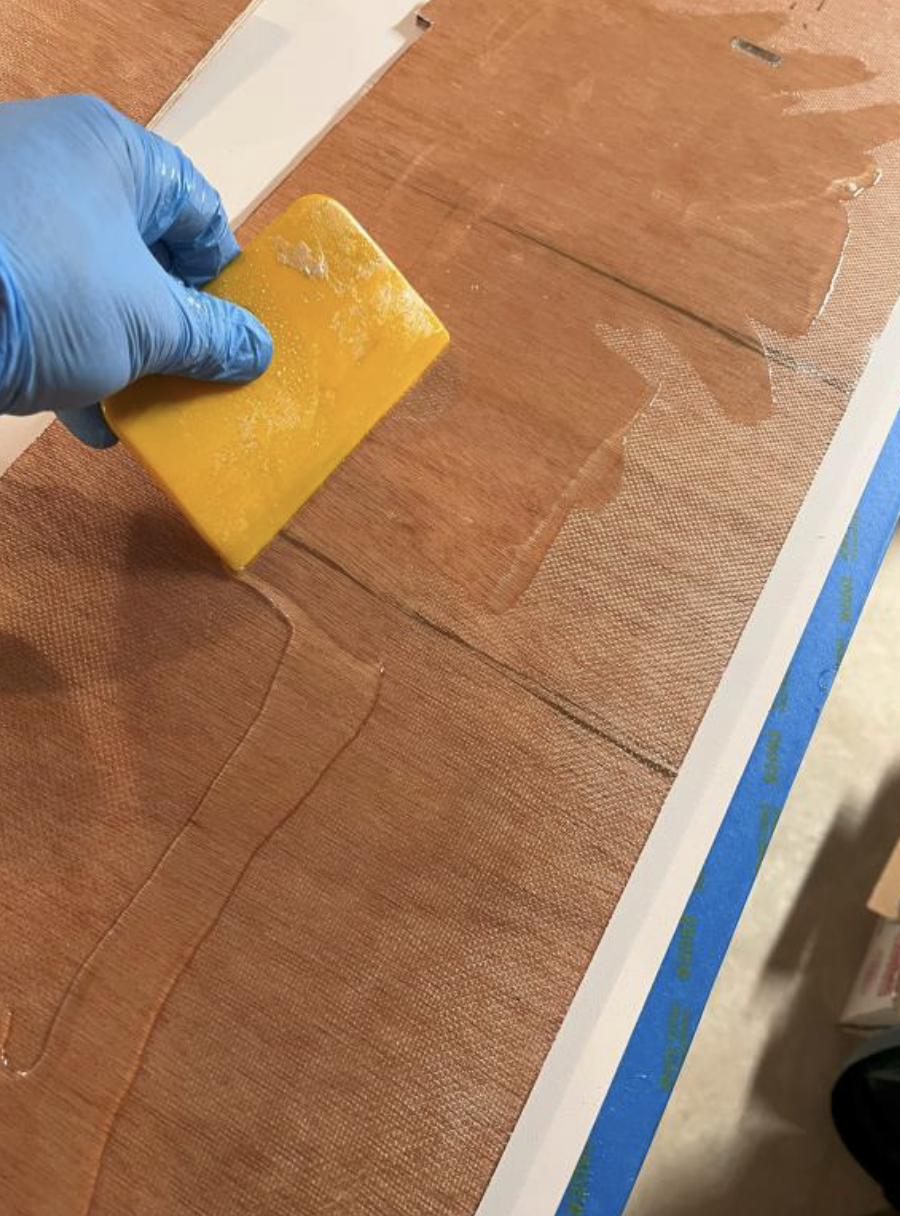
To wet out your cloth, slowly pour resin around the part and sweep it to the edges and down the part with a plastic spatula. I usually will go down the middle and divide the resin towards each side and sweep gently and lightly towards and down the edges watching the wave of resin so as not to overflow onto the table with excess. It’s ok to have some run on the table. Try to keep it from flowwing back to the part and soaking under it. Any excess on the table, let dry. It will scrape up easily with a razor blade to be vacuumed later.
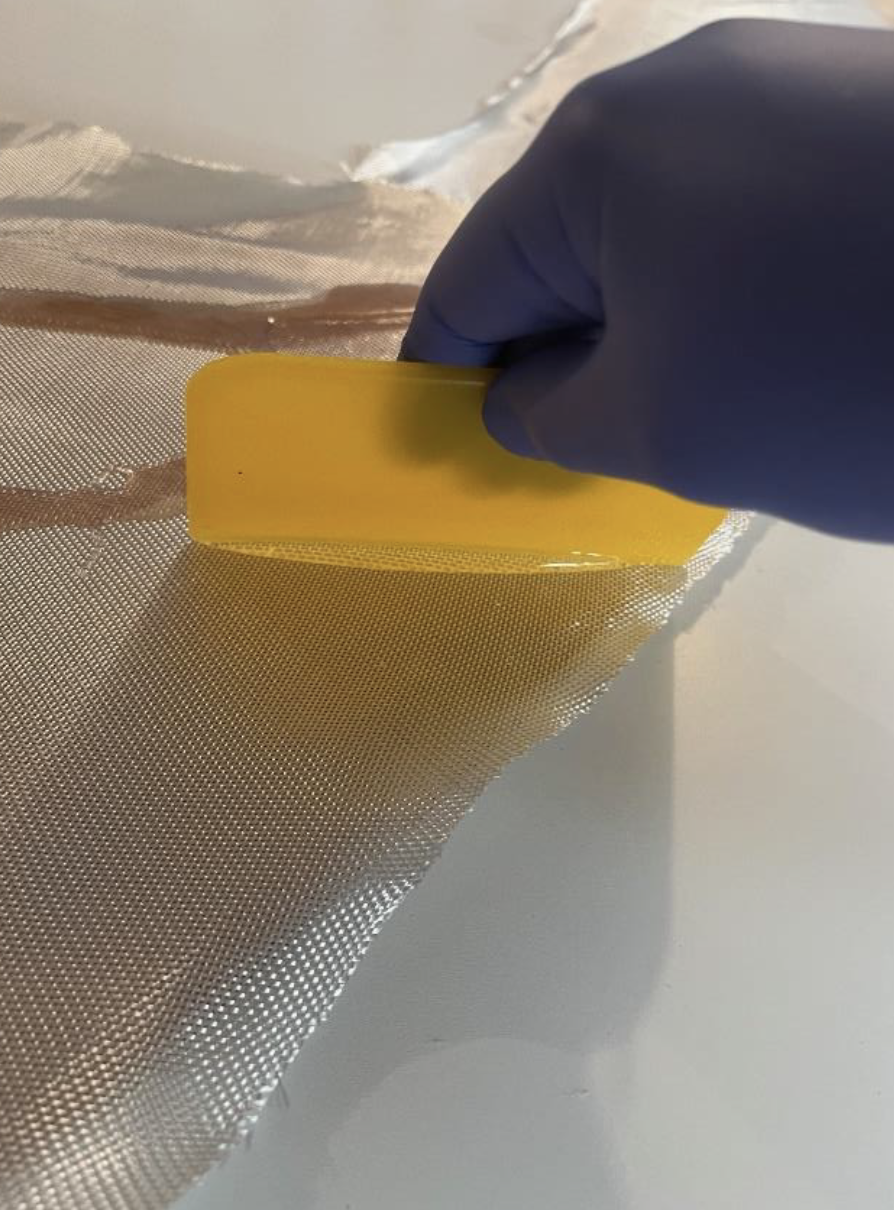
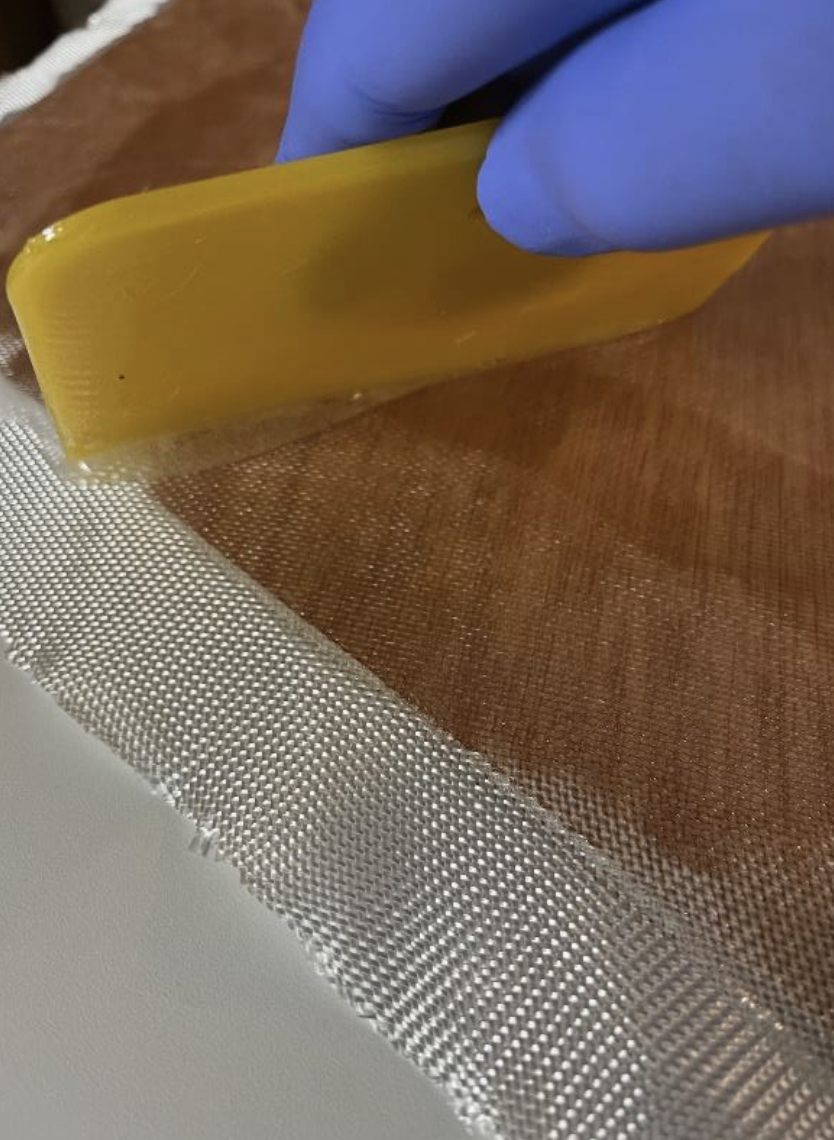
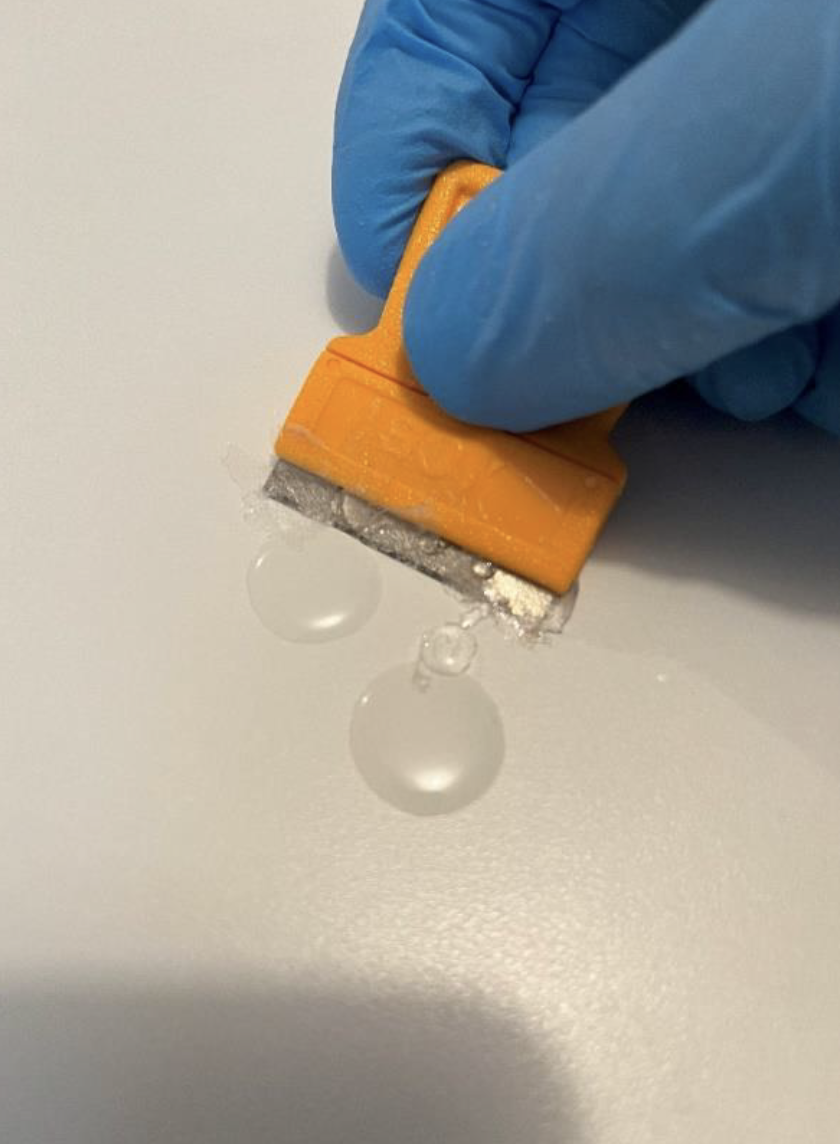
Wet out all the parts then go back with a clean spatula and sweep off excess resin. You can use some pressure for this. Use a mixing cup to scrape the spatula clean of the excess resin. Do not reapply this resin. It will be white with air bubbles.
I usually keep one mixing cup separate for this purpose only. Once the resin dries in this cup you can peel it out and use again.
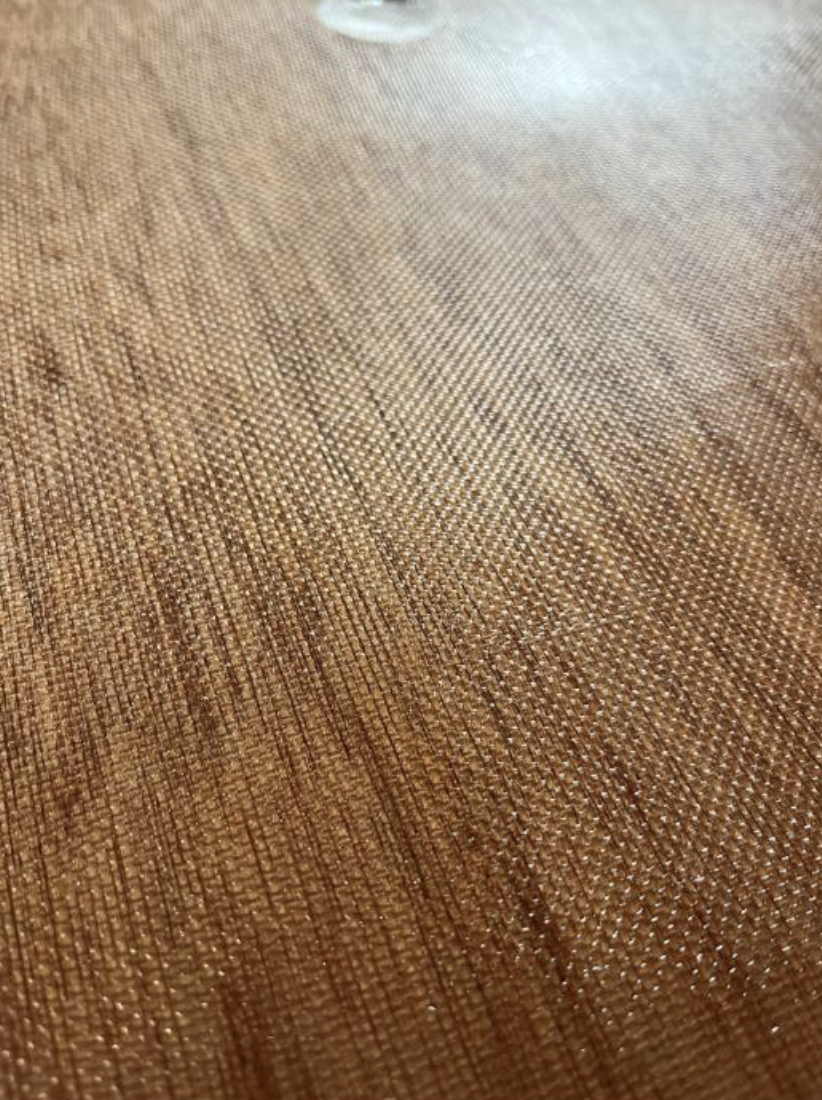
The glass should not have any pools of excess resin on them and the grain or weave of the cloth should stand out once you remove the excess. Let the parts stand overnight.
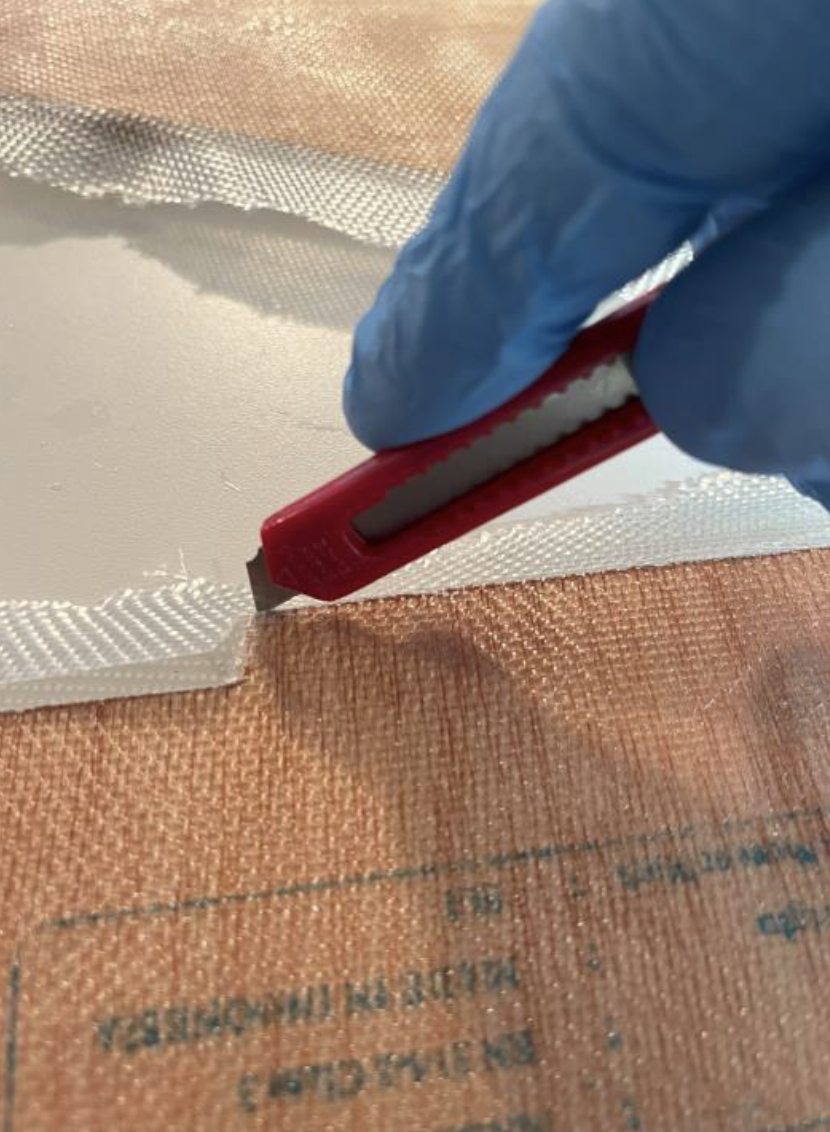
The next morning go and trim excess cloth from around the edges and in any holes that were covered using the retractable razor knife.
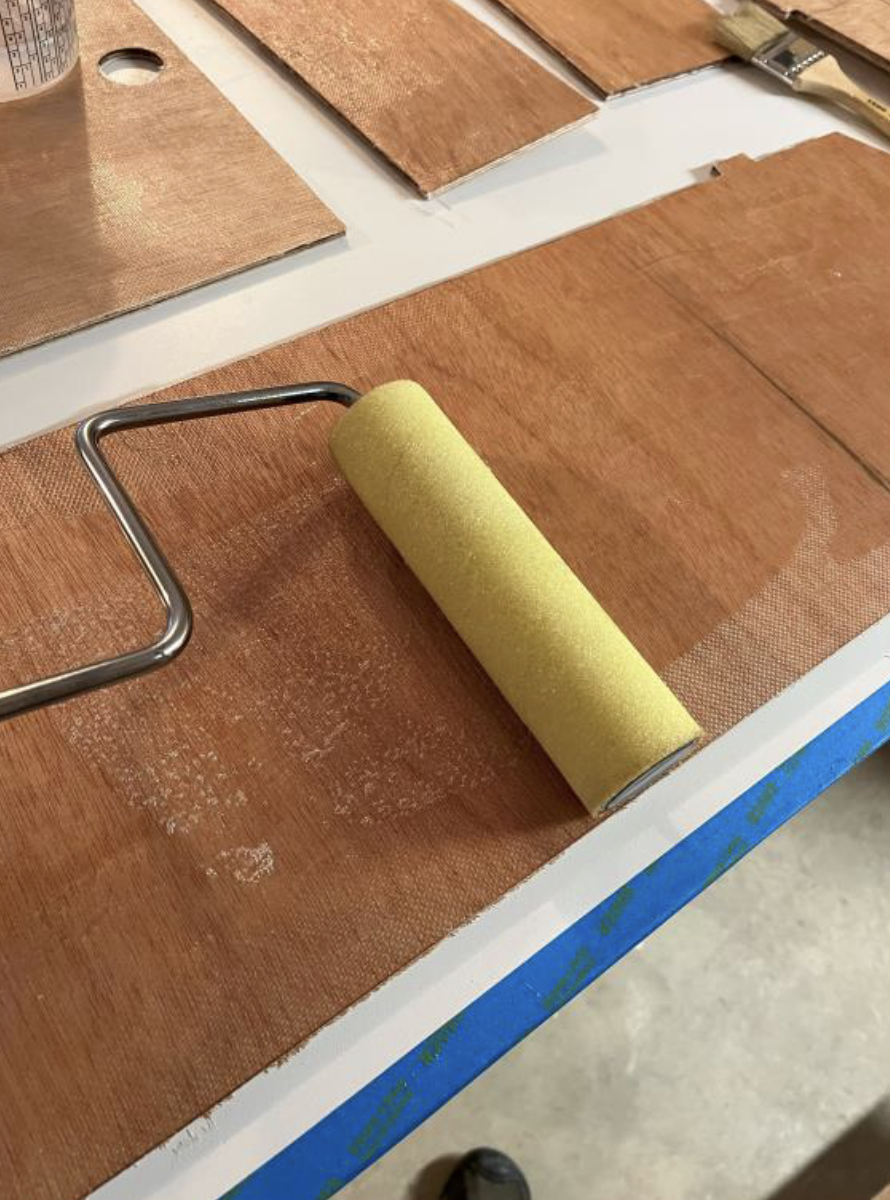
Once one side is totally glassed and set up overnight, go back over it with a filler coat of resin. Pour resin on each part and working quickly, loosely spatula the resin around. Follow up with a roller to get an even coat. Do each part.
After you finish rolling go back over each part with a small or medium sized paint brush. Brush lightly to knock down the air bubbles that will form from the roller. It’s good to start at one edge and move toward the other side with full part long strokes to not miss a spot. Though it’s fairly easy to tell where the bubbles are once you start.
The filler coat can be thick enough to fill the weave of the cloth if you want to make a smooth finish surface.
Be carefull not to let it pool.
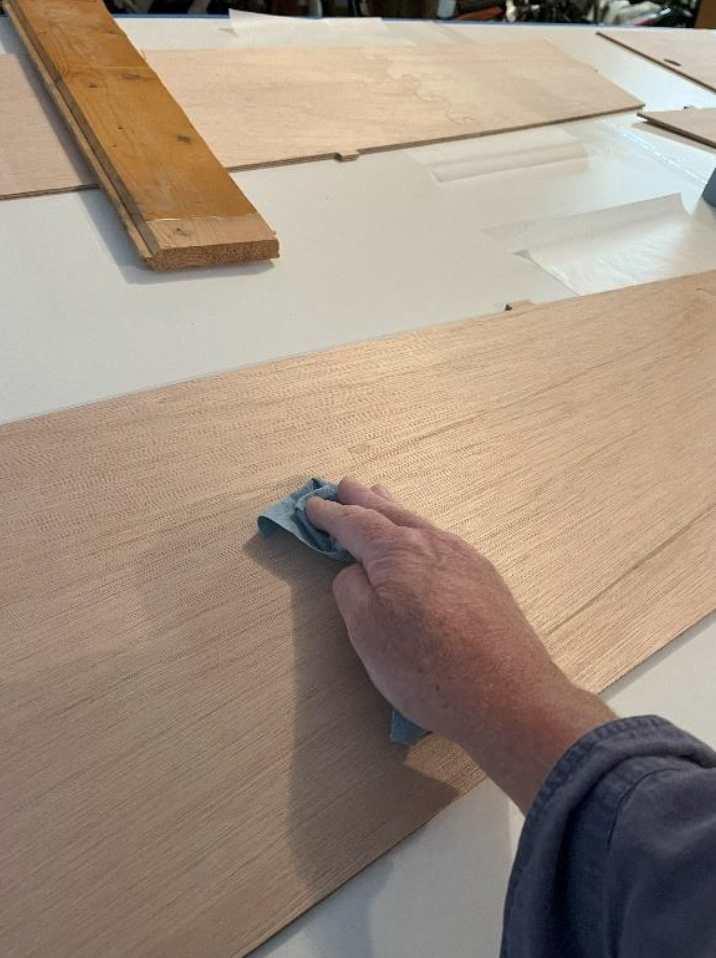
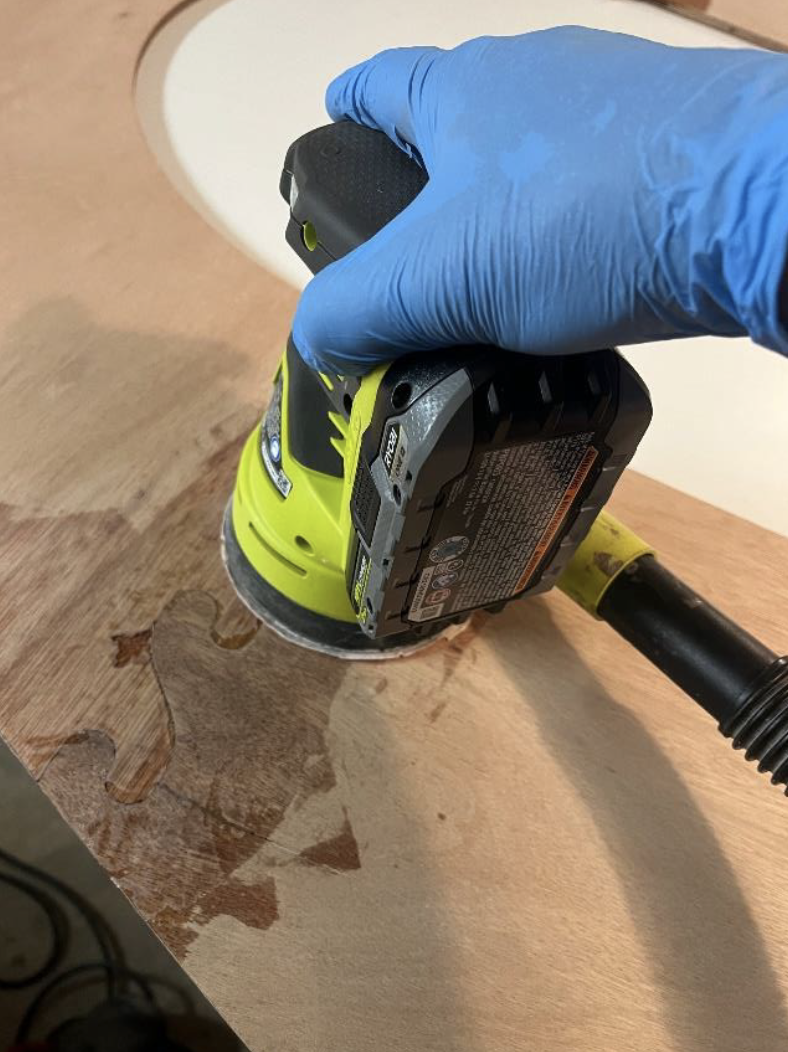
Before glassing the parts that were jointed, be sure to sand the joint area smooth. You may have some ridges that formed from the wax paper or a thicker, pooled area. Use some fine paper and a sanding block. I used an orbital sander and fine paper.
I also used my sander to take off any printing on the parts before glassing.
Once the fill coat dries overnight, it’s time to flip them over and do the other sides. When you flip them over you may notice some drops of resin along the edges that may have migrated to that side. I used a razor scraper to gently knock off those drips.

After finishing my first set of small parts, it was time to start the second batch. Before they were finished, my longer pieces from the first batch were dry and I could set up my deck parts.
You will need to join the three deck pieces together. You’ll also need help flipping the deck to do both joint sides and for glassing both sides.
Once I got to the seat deck parts, I was just able to fit them together on my table in one piece. Along with the second batch of small parts.
The deck part is pretty wide and you’ll need to splice some glass to cover the whole part. I decided to make my splices about 6” from the joints towards the pointed end of the deck. One piece of glass for each “leg” and one for the broad pointed end. Try to cut the glass as cleanly as possible to butt joint the ends without extra long strands of glass sticking out. They will have to be sanded later. Take extra time to tap down the edges of the splice with your spatula. Try not to pull on this area when wetting out the rest of the part. Regardless of how careful you are some sanding will be needed in the splice area after curing.
Once you’ve done your fill coat on the deck, you will need some help to flip it over.
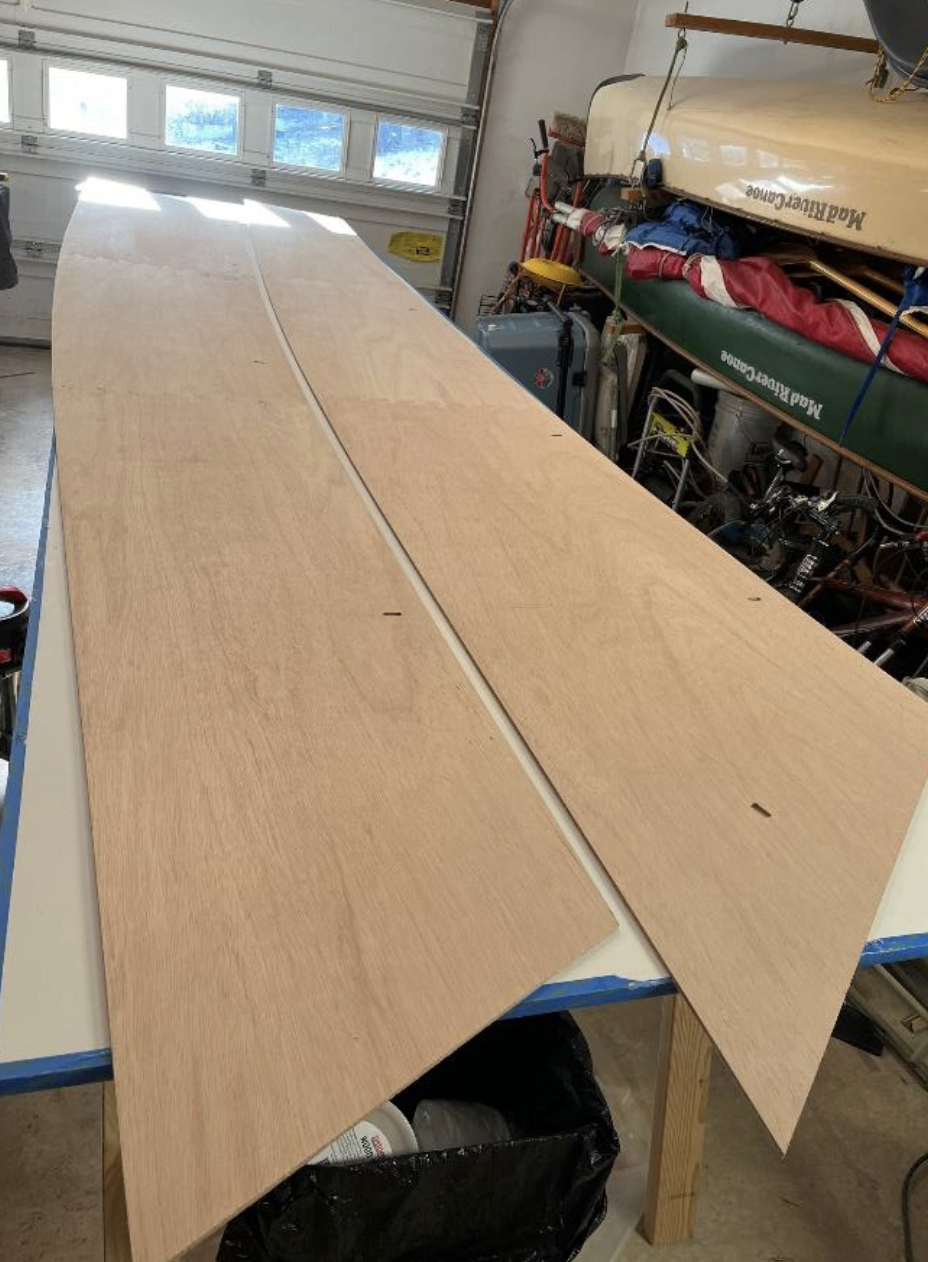
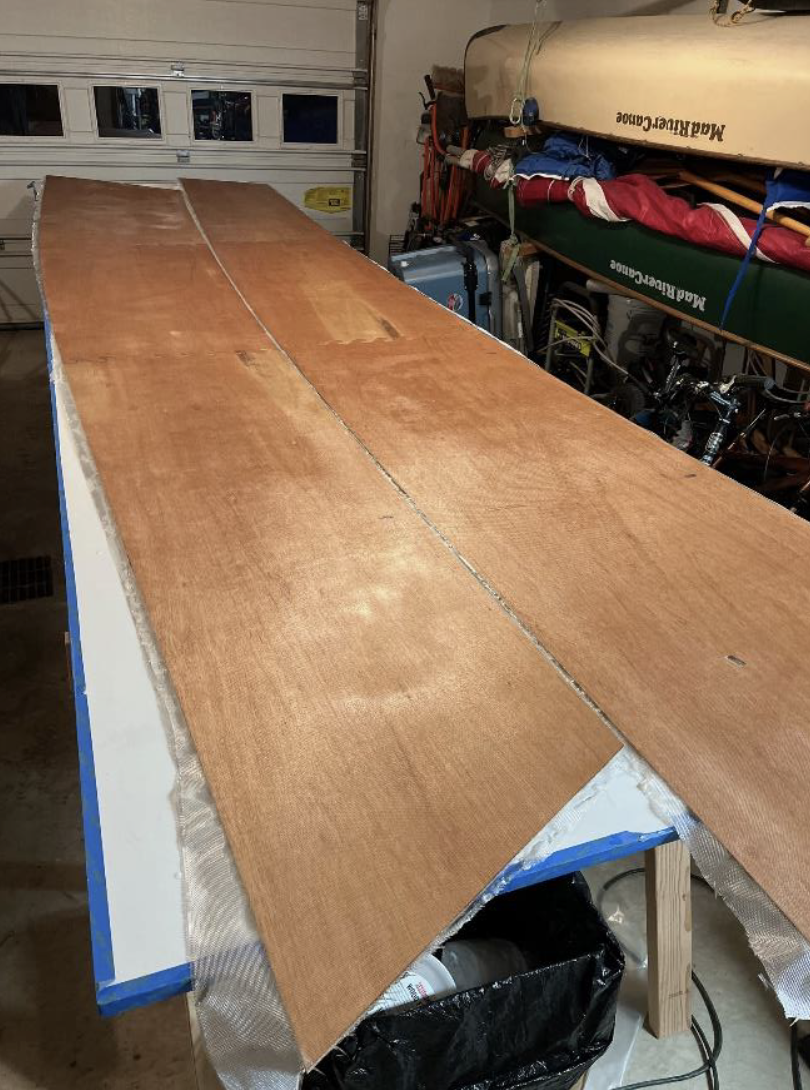
Then you will need help moving it from the table to set your hull side pieces on the table.
With some careful placement, I was able to get both hull sides on the table at once. I was then able to start wetting out the glass on the sides without cutting each piece of glass. That’s a long cut down the middle of the table with scissors. Instead, after I wetted the glass, I was able to cut the glass using the retractable razor knife to separate the pieces. Do this at your own risk. I was successful but it was slightly stressful. You'll have to go back and smooth down any pulled up edges of cloth.
More to come....